If you’re working in the plumbing, construction, or irrigation industry, PVC pipes are a staple—their durability, low cost, and resistance to corrosion make them the go-to choice for everything from residential water lines to large-scale agricultural drainage systems. But here’s the thing: not all PVC pipes are created equal. The right wall thickness isn’t just a spec on a drawing; it directly impacts a pipe’s ability to withstand pressure, resist cracking under soil pressure, and last for decades. As a PVC Pipe Machine supplier, I’ve spent years walking operators through this exact challenge—because too often, even experienced production teams struggle to dial in wall thickness consistently. I’ve seen lines shut down, material wasted, and orders delayed all because of a small misadjustment in the extrusion process. Today, I’m breaking down how to adjust your PVC pipe machine’s wall thickness properly, with the same practical tips I share with my own clients every day. PVC Pipe Machine

First, let’s get one thing straight: wall thickness adjustment isn’t a single step—it’s a balance of several interconnected machine settings, material properties, and quality checks. It’s easy to reach for the first dial you see and turn it, but that can throw your entire production off. The core goal here is to control the flow of molten PVC through the die (the shaped opening that forms the pipe) and the cooling process, so the material cools and solidifies evenly into a wall that’s uniform along the entire length of the pipe. Even a tiny variation—say, a 0.1mm difference in wall thickness along a 6-meter pipe—can cause it to fail pressure tests or be rejected by inspectors.
Let’s start with the most critical component: the extrusion die. This is the heart of your pipe machine, and it’s where wall thickness is first shaped. Most modern PVC pipe machines use a spiral or crosshead die, and they’re designed with adjustable die rings that let you tweak the gap between the inner mandrel (the part that forms the pipe’s inside diameter) and the outer die body (which forms the outside diameter). Before you touch any adjustments, you need to make sure the die is clean and aligned. I can’t tell you how many times I’ve arrived at a client’s facility to find a buildup of old PVC resin or debris in the die gaps, which causes uneven flow and inconsistent wall thickness. So step one: shut down the machine, let it cool completely, disassemble the die, and inspect each ring and the mandrel for any residue. Even a tiny speck of PVC the size of a grain of sand can create a thin spot in the pipe wall.
Once the die is clean, you can start adjusting the die rings. Here’s the rule of thumb I teach: if one side of the pipe has a thinner wall, you need to decrease the gap on that side. Wait, let me clarify that—if the pipe’s outer circumference is thinner on the left, that means the gap between the outer die body and mandrel on the left is too wide, so the molten PVC flows faster there. Tightening the die ring on the left side reduces that gap, slowing flow just enough to match the rest of the wall. Don’t overdo it, though. A quarter turn of the die ring is almost always enough for a small adjustment. If you crank it too far, you’ll restrict flow too much, cause pressure to spike, and lead to other issues like uneven cooling or die buildup.
Next up: the screw speed and extrusion pressure. These two settings work hand-in-hand. The screw inside the extruder barrel melts the PVC resin and pushes it through the die. If you increase screw speed, you’re pushing more molten PVC through the die, which can make the pipe wall thicker—if you adjust it at the right time. But here’s the catch: if the cooling line isn’t keeping up, faster screw speed can lead to uneven cooling, which creates wall thickness variation even if the die gap is perfect. Let’s say you’re making a 110mm diameter pipe with a 3mm wall. If your screw speed is set too low, the PVC doesn’t fully melt and flow smoothly through the die, leading to thin, brittle spots. If it’s too high, the material moves too fast, and the cooling line can’t solidify the wall evenly, especially near the edges. I recommend testing screw speed increments of 5-10 RPM at a time, and after each change, run a 1-meter sample pipe, measure the wall thickness at 4 points (top, bottom, left, right) with a micrometer, and record the numbers. Small, incremental adjustments are way better than guessing at big changes here.
Then there’s the vacuum calibrator, a component that’s easy to overlook but critical for wall thickness control. The vacuum calibrator is a water-cooled chamber that the pipe is pulled into right after it exits the die. It uses negative pressure to hold the pipe’s shape as it cools, which directly impacts the wall thickness. If the vacuum level is too high, it can squeeze the pipe wall, making it thinner than your target. If it’s too low, the pipe can expand slightly as it cools, leading to thicker or uneven walls. For most standard PVC pipes, a vacuum level of -0.02 to -0.04 MPa is a good starting point, but that can vary based on pipe diameter and wall thickness. I always tell operators to check the vacuum calibrator’s seals first—if there’s a leak in the chamber, the vacuum won’t be consistent along the pipe’s length, leading to wall thickness variation. A quick way to test this: run the machine without the pipe in the calibrator, close the door, and see if the vacuum holds. If it drops more than 0.01 MPa in 10 seconds, you have a leak that needs sealing before adjusting vacuum levels.
Cooling tank temperature is another piece of the puzzle. Molten PVC is soft when it exits the die, so cooling it too fast can cause the wall to shrink unevenly, while cooling it too slow lets the pipe deform before it’s solid. Most PVC pipe machines have two sections in the cooling tank: the primary cooling section (closer to the die) uses warmer water (around 20-30°C) to gradually solidify the outer wall, and the secondary section uses cooler water (10-15°C) for final cooling. If the primary water is too cold, the outer wall solidifies before the inner wall, and when the inner material cools and shrinks, it can pull the wall thinner. I’ve seen clients accidentally set the primary cooling water to the same temperature as the secondary, and that alone caused a 0.5mm drop in wall thickness on a 6m pipe. Adjust the primary water temperature first when you’re tweaking wall thickness—this is often a simpler fix than adjusting the die or screw speed.
Now, let’s talk about material properties, because even the best machine settings won’t work if your PVC resin isn’t consistent. PVC pipe is usually made with a blend of virgin resin, stabilizers, lubricants, and sometimes fillers like calcium carbonate. If you switch resin batches without adjusting settings, that can change the melt flow rate (MFR) of the PVC, which directly impacts how it flows through the die. For example, a resin with a higher MFR flows more easily, so you might need to slightly decrease screw speed or adjust die gaps to compensate. I always recommend that my clients keep a log of every batch of resin they use, along with the machine settings used, the wall thickness achieved, and any issues like brittleness or uneven walls. That way, when you switch batches, you can reference past data instead of starting from scratch. Also, don’t forget about lubricants—too much internal lubricant can make the PVC slip too much through the screw, leading to inconsistent flow and wall thickness, while too little can cause the screw to wear faster and unevenly.
Once you’ve made your adjustments, you need to measure and verify the wall thickness properly. Relying on visual checks is a mistake—even a trained eye can miss a 0.2mm variation. Use a digital micrometer to take measurements at 3 or 4 evenly spaced points along a 1-meter sample pipe, and also check a longer pipe (5-6 meters) to make sure the thickness is consistent from start to finish. Many modern PVC pipe machines have integrated wall thickness sensors that do this automatically, which saves a lot of time, but if your machine doesn’t have that, regular manual checks are non-negotiable. You should also test the pipe’s pressure rating, because even if the thickness looks right, inconsistency can cause it to fail a hydrostatic test. For standard pressure pipes (like Schedule 40), the tolerance is usually ±10% of the nominal wall thickness, so a 3mm wall should be between 2.7mm and 3.3mm. If you’re making pressure-rated pipe for underground use, the tolerance is often tighter, around ±5%, so your adjustments need to be more precise.
I’ve also learned a few common mistakes that trip up even experienced operators. One is adjusting the die rings while the machine is running at full speed. Molten PVC is under pressure, so if you turn a die ring while the machine is active, you can cause uneven flow that’s hard to fix later. Always shut down the extruder, reduce the barrel temperature to 150-160°C (to solidify the PVC in the die), and then make your die adjustments. Another mistake is not letting the machine stabilize after adjustments. When you change a setting, it takes 5-10 minutes for the molten PVC to work through the extruder and die, and another 2-3 meters of pipe to cool and solidify. Don’t take a measurement right after adjusting—wait for the pipe to be fully formed and cooled before checking thickness.
If you’re still struggling after trying these steps, it might be a sign that your machine needs routine maintenance. Worn screw barrels, damaged mandrels, or a die that’s out of alignment can all cause persistent wall thickness issues that adjustment alone can’t fix. That’s where working with a reliable PVC Pipe Machine supplier makes all the difference. I’ve had clients who tried to cut corners on maintenance, spent weeks tweaking settings with no luck, and then found out their mandrel was warped from years of use. A quick inspection and replacement of parts fixed the problem entirely, way faster than they could have adjusted settings on their own.
At the end of the day, adjusting wall thickness on a PVC pipe machine is about balance. It’s not just about turning dials—it’s about understanding how each component interacts, from the die’s gap to the cooling water temperature to the resin you’re using. Consistency is key, too: once you find the right settings for a specific pipe size and material, stick to them, and keep detailed logs so you can replicate it every time.
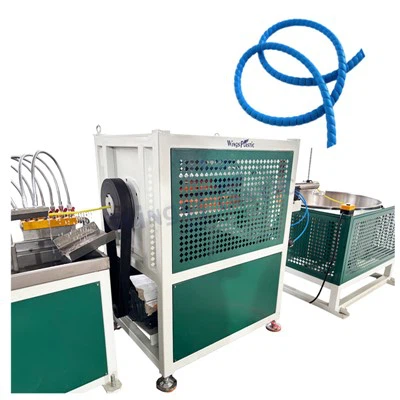
If you’re dealing with inconsistent wall thickness, wasting material, or having trouble meeting order specs, don’t guess at fixes. Reach out to our team for guidance tailored to your specific machine and production needs. We’ve worked with production lines of all sizes, from small batch operations to large-scale manufacturing facilities, and we can help you dial in your settings to meet your quality standards and reduce waste.
Plastic Corrugated Pipe Machine References
- Briston, J. (2019). Extrusion Technology for Plastics and Polymers. Hanser Publications.
- PVC Pipe Manufacturing Guidelines. Plastics Industry Association (PIA).
- Modern PVC Extrusion Machine Operation Manual, 5th Edition. Industrial Machinery Press.
- ASTM D1784 Standard Specification for Poly(Vinyl Chloride) (PVC) Compounds. American Society for Testing and Materials.
Qingdao Wings Plastic Technology Co., Ltd.
As one of the most experienced pvc pipe machine manufacturers and suppliers in China, we also support customized service. Please feel free to buy durable pvc pipe machine made in China here from our factory. For price consultation, contact us.
Address: C02 Of Anshengyi Road, No.2 Fuan Industry Zone,Jiaodong Town, Jiaozhou City, Qingdao City, Shandong Province,China
E-mail: kelly@wingsplastic.com
WebSite: https://www.wingsextruder.com/
